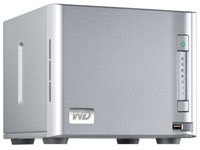
The lights on the unit were: Power = solid green, Hard Drives = solid orange, Network = randomly blinking green. The power button would not work either, I had to unplug the power cable to turn the unit off.
The reason for this is Windows has it's own file system (FAT/FAT32/NTFS) and WD uses a different one (EXT3). You also can't access the admin interface of the NAS unit because it has to copy it's operating system from it's firmware onto one of the installed drives. Resetting the unit with the reset button on the back of the unit doesn't work either. Western Digital's support team's solution, is to ship it back to WD for a replacement drive (you've got to be kidding me).
Here's what I did to get it working:
1) Install the WD drive you plan to use in the NAS unit into a Windows computer as a secondary drive and make a back up of any data on the WD drive you want to save or you will lose it in step 6.
2) Download and install WD Data Lifeguard Diagnostic for Windows.

3) Run WD Data Lifeguard Diagnostic program and accept the agreement.

4) Right-click the correct WD drive (to be used in the NAS unit) and select "Run Diagnostics".

5) Select "Write Zeros" and hit "Start".
6) Click "OK", then "Yes", and "Yes" again, on the warning boxes.
WARNING: You are completely erasing data and will not be able to recover it, so make sure you selected the correct drive in step 4.

7) Choose "Quick Erase" to write only the first and last sectors of the drive and hit "OK".

8) Once that finishes click "Close" and remove the WD drive from your PC and install it in Slot 1 of your WD ShareSpace NAS unit by itself (there should not be any other drives installed, if there are, remove them).
9) Power on the NAS unit and let it do it's thing (~3-5 min.) The lights on the unit should blink randomly and eventually turn solid green. (The unit should be copying the file system from it's firmware onto the new drive and installing the admin interface)
10) After all the lights turn solid green, you can try accessing it from a PC by running WD Link to find it or typing in the IP address of the NAS unit into a browser to bring up the admin interface. (Note: the default username AND password are both "admin")
11) If you have other drives you need to prep for your NAS unit, repeat steps 3 thru 10.
Have a problem, question or comment ? Let me know below.
Had already seen this but it was so long ago I forgot where, so your post really came in handy! Thank you so much ^^
ReplyDeleteHello !
ReplyDeletecool!
your process is true,
thanks a lot
Can I install 3 Tera wd hd in sharespace?
ReplyDeleteIt won't hurt to try it, however, I don't believe it will work unless they've released a firmware update.
DeleteThanks! worked for all my drives! Before that my WD Sharespace wouldnt turn on properly
ReplyDeleteIs it confirmed that the SS will only work with WD drives, or can I pop some seagates in there as well?
ReplyDeleteanyone had any issues tried using the wd util no luck also tried the mybook rescue tool no luck it just sits there with all 4 disks (even when only 1 plugged in) as orange any ideas?
ReplyDeleteThis comment has been removed by the author.
ReplyDeleteSo after step 10 we just turn off the WDShareSpace unit and install the other three drives (0'd out). Turn it back on and the unit creates the RAID 5 settings on all 4 drives?
ReplyDeleteHey thanks heaps for the tips! My WDShareSpace was unresponsive and power button wouldn't work etc and I was looking at RMA until I found this. Slotted in another drive with zero's written and it came good again. Now I have 3 drives that I'd been spanning across which I can't get data back from yet. Has anyone tried adding a new drive with zeros written to an existing unresponsive span of 1, 2 or 3 drives? I don't think it will work but maybe when it detects the new disk it will try to write firmware to it and I will get my data access back. Not brave enough to try it just yet though. Don't want to risk losing the data forever.
ReplyDeleteYour sir, are a legend among men. You have saved me a lot of frustrated swearing and pulling my hair out. I thank you for your amazingly helpful tutorial
ReplyDeleteThanks very much for these helpful instructions!!
ReplyDeleteQuestion: has anybody tried to install something other than 1 TB drives into this unit? I have the last released firmware and not sure if it will even accept anything other than 1 TB drives. I'd like to try bumping them up to 2 or 3 TB X 4, but not sure if the firmware will accept that size. Has anyone had any luck with that? Thanks in advance.
Thanks very much for these helpful instructions!! U saved my unit!
ReplyDeleteThis is perfect solution. I have WD Sharespace and it's wasn't working since long. The Power and Reset button was not responding. I remove the hdds and format with windows OS.
ReplyDeletei contact WD for same but they did nothing. seems that they are not willing to care about customers.
Finally this solution works out and the unit is working fine.
I was hoping this would work, but it did not. I followed the directions but my WD Sharespace is still unresponsive. Power light stays lit and network flashes but no other activity. Ugh.
ReplyDeleteLate reply I know, but only for the benefit of other readers....
DeleteIf the NAS is unresponsive, remove the CMOS volatile memory battery in the CPU and replace with new (CR2036 or similar).
The battery is behind the front panel power switch and indicater leds.
Motherboard that is... not CPU :-)
DeleteMuchas gracias por el tutorial.
ReplyDeleteHa funcionado perfectamente.
He cambiado los 4 discos de 1 TB, que venían de serie, por 4 de 3TB WD RED.
Solo reconoce 2TB por disco. Una pena que la gente de WD no hayan sacado actualizaciones para reconocer discos de mayor tamaño.
don't work, what can i do?
ReplyDeleteWow mine worked, thanks a millon
ReplyDeleteThanks for the guide. I have discovered that you MUST add drives one at a time else it locks up. So I'm in the process of adding drives one at a time, then will rebuild it as raid 5.
ReplyDeletemau bonus ? klik disini judi sabung ayam
ReplyDeleteAnyone know where to find earlier versions of the firmware?
ReplyDeletei just removed the partitions entirely with windows 10 disk management, and it also detected the wd green drives. seagates gave an error - greets thomasdb.net
ReplyDeletemau yang asik ? adu ayam
ReplyDeleteThis worked and I love you now!
ReplyDeleteI can confirm that drives larger than 2TB do work (but only 2TB is seen) in the WD Sharespace.
ReplyDeleteOne of my four 2TB drives went faulty and I placed a 500 gig WD in its place.I recently decided to replace that smaller drive with a larger 3TB. I "Zero'ed" all drives and placed only the 3TB drive in. The System files copied over and the device booted up. Due to the firmware though, only 2TB is seen. I then added other 3 drives (2TB WD Greens)one by one. (Add the 2nd drive and boot up - wait until it is 'added' to your selected RAID choice. Shutdown and add the next drive, etc. Some other info: ANY Western Digital Drive can be used (Black, Blue, Green, Red) as long as it is a WD Drive.
HI I wanted to ask - I have just added a WD20EADS drive to my Sharespace, replacing a dead disk. Admin software reports that the disk is not installed. As the NAS is set up as RAID5 I was hoping it would just rebuild itself. The Manual suggests this is the case? I have data on the NAS I dont want to loose and its functioning on 3 disks.. Could anyone suggest what I can do to install the disk and get it rebuilding? Cheers S
ReplyDeleteDoes the new drive have any partitions on it? The new drive that you install must be 'zero'ed'
DeleteTips dan Trick Bermain Judi Online
ReplyDeleteAgen Togel Hongkong
Agen Togel Singapura
Agen Togel Sidney
Museumbola Slot Habanero
Museumbola Slot Pragmatic
Museumbola Slot Pulsa
Museumbola Livecasino
AKSES SEGERA SITUS KAMI 1 ID BANYAK PERMAINAN
WA OFFICIAL : +6283157394921
Hi! How to WD sharespce factory reset use reset button?
ReplyDeleteI’m having trouble posting, so long story short, old WD20EADS drive failed, replaced with a WD 2TB Rec drive, RAID rebuilt (in about 27 hours) and all data recovered.
ReplyDeleteBrilliant! After 8 years one of the original WD20EADS drives failed in my 4 x 2TB disk RAID 5. Formatted a new WD20EFAX (WD 2TB Red) using the instructions above. Powered down, pulled the failed drive (number 1), slotted in the new one, and powered it up. New drive is recognised and drive status is good. 38 hours later it’s still ‘recovering’ but I can see files and folders on the system so I’m optimistic.
ReplyDeleteHey, had one fail today so going to pop out and get one as you suggest.. did it complete successfully?
DeleteMatt what are the status lights showing during the rebuild. I cannot get a raid rebuild to begin following the procedure but did manage to see all green solid drive lights. I'm having trouble seeing the SS on the network therefore unable to access it using windows network or any of the WD software like WD Link or WD discovery??
DeleteI encountered a failed drive in my SS RADI 5 with all original drives and was able to find a good working identical WD drive matching the other three. In the disk manager or the RADI manager of the SS GUI I was never able to fix the unassigned error of the replacement drive that showed good in the GUI. This procedure worked to eliminate that and appeared to be successful however I am unable to access the SS using the Windows network browser. All drive lights are solid green, activity light blinks with net activity but the check mark display is not lit blue as I think it should be indicating readiness or availability of the SS. I cannot find the SS using WD link or see it in the local network so I am wondering if erase the drives caused this. I thought network readiness was addressed by the firmware on the SS not the drives. Any ideas how to get access to the SS?
ReplyDeleteMuch thanks!
When reconnecting the single drive back into slot 1 in this procedure is it necessary to have the Ethernet cable connected? This was not mentioned in step 8 or 9. Obviously, the drive has to be connected to the local LAN to see it on the network but I have done this as well and I am still unable to see the SS in the network as in the past. The Identification light is not illuminated as it was originally. Does identification enabling occur automatically or not and does it have to be enabled to see the SS on the network?
ReplyDeleteI have also reset the SS using the reset button on the rear which only resets the user name and password thinking that this would begin discovery of the SS on the local network. Still not showing and it remains unreachable. I have not updated the firmware and dare not to based on the horrific experience others have shared.
Thanks!
Is there anyway to reset the SS to factory default settings NOT JUST the user name and password but everything without access to the SS web page GUI? Since I cannot get network access to it, I can't get into the GUI where the main reset resides.
ReplyDeleteThanks!
I would very much appreciate input on my reported issue.
ReplyDeleteAgain, with the single drive prepared in accordance with all steps 1-8, I cannot see the SS on my local network or reach the admin login page. I had set a static IP for the SS while it was working normally a year ago and had not changed it. Does the static IP get saved in the firmware non-volatile memory? I have tried using the old static IP but nothing found. PLEASE HELP PLEASE. Thanks
I have pretty much the same issue as you JKB but it just recently happened to me with my SS 4-1TB RAID5 setup. Started with a failed A/C adapter. No problem right? Got a replacement. Looked like things were going to work out. It started, noticed the stripe set was "dirty" and started "Resyncing" the drives. Took over 3 days but when I checked back it looked like (from the sys log) it had gotten past 80% finished when it detected the next "unexpected" shutdown. Long story short, I tried to get it to respond to via Web GUI, SSH, or even ping but to no avail. After rebooting LEDs settle to solid green for all 4 HDDs and the network is flashing but the Power light never comes back on. The only thing that got it to slightly respond to a ping was to pull all the drives, install a single replacement (zeroed out) drive and let it do it's thing. However, I was never able to connect to the WebGUI admin interface nor via SSH (which I was able to do previously). I'm too afraid to do anything with my 4 original drives.
DeleteAnyway, it looks like we're both SOL given that you haven't gotten a single response to any of your posts.
The original link to the software is down, but I found it in CNET. Putting the link here in case anyone needs to download it - https://download.cnet.com/Data-Lifeguard-Diagnostic-for-Windows/3000-2086_4-10972008.html
ReplyDeleteThanks OP for this, finally got my Sharespace working again!