I replaced the faulty PCV valve which solved the smoking, but didn't want my intake to get dirty again, so I decided to install an oil catch can to collect any oil that got pass the PCV valve before it made it into the intake manifold.
 |
| 750ml Oil Catch Can from eBay |
1) Catch Can (~$30) - I used one from the eBay store "ilovetacotaco".
-- I chose this can for the medium size (6"H x 3"Diameter), drain at the bottom, view level, and ability to remove the top and bottom. This allowed me access to install an optional baffle that helps seperate the oil from the air. You can also rotate the top to point the hose barbs in another direction.
2) About 7 ft of 5/8" heater hose (~$12)
3) Metal straps to use as brackets (Home Depot or AutoZone)
4) Thread lock - so the screws don't vibrate loose after driving around
5) 4 - 1" hose clamps
6) Washers
7) Plumber's tape - petroleum resistant, yellow (not the common white kind)
8) Small piece of sheet metal, Sandpaper & JB Weld (optional) - if you want to make a baffle for inside the can
9) Spray paint (optional)
10) Zip ties (optional)
11) Gasket maker or silicon (optional)
TOOLS:
1) 10mm wrench
2) Phillips screwdriver
3) Pliers for removing stock hose clamp
4) Utility knife
5) Hammer
6) Vise (optional)
7) Dremel or metal shears (optional)
A) INSTALLING AN INTERNAL BAFFLE (optional):
I decided to put a baffle divider on the inside of the catch can so that the air/oil mixture has a longer path of travel to get to the other side and exit the catch can.

1) Remove the hose barbs and remove the top by unscrewing the (6) 3/32" allen screws and sand the anodized paint from the inside top-most part. This is where our baffle will attach and we need a good clean surface for the JB Weld to hold on to.
 |
| Looking inside the catch can with the bottom removed |
2) Download & print the template below to scale (don't use "fit to page" on your printer), cut it out with scissors and then trace it onto a thin piece of sheet metal. Then, cut the sheet metal with a dremel or metal shears.
 |
| Download Full Size & Print to Scale |

3) Mix up some JB Weld, bend the baffle where indicated, and attach it to the inside of the catch can as shown. Wait 24 hrs for the JB Weld to set. Then reinstall the lid with the new baffle divider attached.

B) CATCH CAN PREP:
There was some work that needed to be done to my catch can before I installed it to make it more air-tight.
1) Unscrew both the bottom of the catch can & drain plug and apply a small amout of oil to both of the O-rings, then screw them both back on. (Tip: pull out the dip stick and run your finger along it to get some oil to use)
2) Remove the (2) 5/8" hose barbs on top and apply some yellow plumber's tape to the threads, then reinstall.
3) Remove the top by unscrewing the (6) 3/32" allen screws and apply a thin layer of either gasket maker or silicon to the rim and reinstall top. (Before you re-attach the top, make sure it is rotated the way you need it to face so that it lines up with how you're mounting it and running the hoses.)
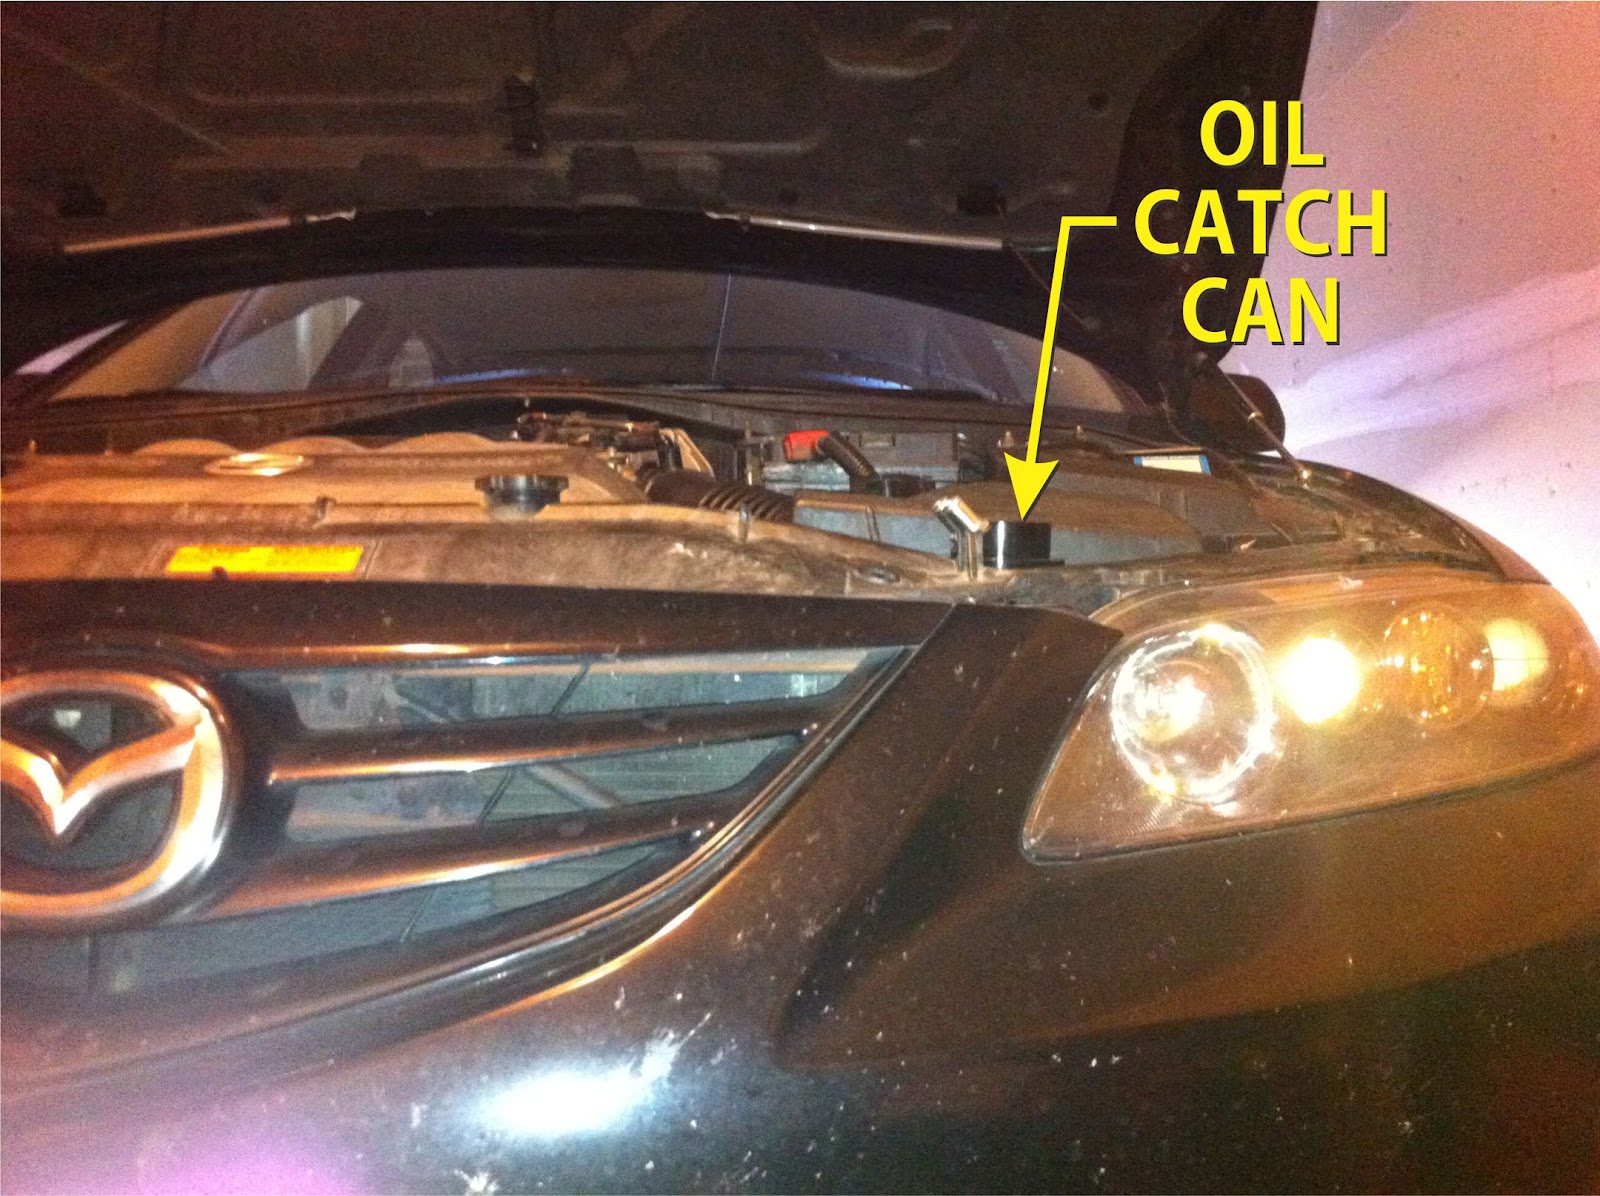
C) FIND MOUNTING LOCATION:
The only good place I found was up near the stock intake box and driver's side headlight. This made easy access to view the level and had a few mounting bolts nearby to mount the catch can. However, I did need to make room by cutting off the piece of plastic that stuck out from the top lid of the stock airbox. (If you have an aftermarket intake, you should already have enough room here and can skip these next 3 steps):
1) Remove the top lid of the airbox by unclipping the (4) metal clips, unplug the connector to the MAF sensor, and loosen the main hose clamp to slide the hose off the airbox lid.
 |
| Where to cut the extra plastic attached to the lid of the stock airbox |
2) With the lid of the airbox removed, take a sharp utility knife (or dremel) and cut the extra piece of plastic that is attached. I made a couple of passes on each side with the knife, then took a hammer and knocked it off, piece by piece (see pic above).
3) With the extra plastic removed, re-install the airbox lid, connector, and hose clamp.
D) MOUNT THE CATCH CAN:
1) Once you find a place, then find an existing bolt that you can use and start bending your metal strap to create a bracket. I placed the strap in a vise and used a hammer to make multiple 90 degree bends until I got what I needed. You can see how I mounted mine in the pictures below, using the top 10mm bolt from the radiator and the lower 10mm bolt from the fan sensor.


2) Once you've got a dry fit, close the hood and make sure you have enough clearance.
3) If everything is good, you can remove the brackets and paint them to look a little more finished. When you re-install the brackets, put some lock-thread on the threads of the (2) screws on the catch can. This will keep them from vibrating loose over time.

E) INSTALL THE HOSES:
1) First, we need to remove the old hoses that are being used.


 2) I removed the straight piece of hose, but kept the 90 degree bent hose and 90 degree plastic elbow and reinstalled it. This made it easier to attach my new hose from the catch can without getting sharp bends.

3) Tighten up all hose clamps and start the car. If it idles high or surges and has trouble idling, check for vacuum leaks because it means something is loose or not sealed correctly.
4) If everything sounds good, go for a short test drive and then check to make sure the hoses are not rubbing excessively against anything. Also make sure catch can is still secure and not getting loose.
Have a problem, question or comment ? Let me know below.
No comments:
Post a Comment